Read about Steve Barber's efforts to restore K-38 #27.
Purchased by Steve Barber in Sept. of '98 from what appears to have been its 3rd owner, K-38 #27 was discovered to have extensive rot in the transom and stern planking. The cause of this was an overweight diesel auxiliary (Pisces 27 hp, 2cyl) bringing the vessel to sit below the boottop at the stern. The original date of placement of this engine in the boat is unknown, but it had been in long enough such that what appears to be at least a decade's worth of rainwater had collected aft of the scuppers and soaked into the transom. This lack of drainage in combination with minimal ventilation did the deed.
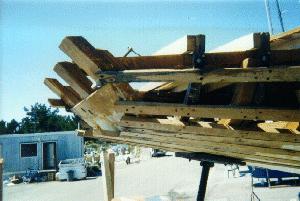
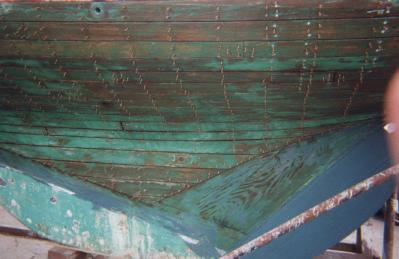
Rot extended a minimum of 7" into some of the planks and as much as 2.5 feet in others. Every plank in the stern was affected. The transom face and underlying structure was also totally involved with rot. Approximately a foot of deck was infected. The boat deserved better than penetrating epoxy, which probably wouldn't have worked anyway as the rot was dust when dry and mush when wet. So, Steve commissioned a bay area firm, "Dockside Maintenance and Salvage", with over 35 years experience in wooden boats to help with the project. Steve and "Dockside" decided to replace the transom, supporting structural oak, and all the planks in the stern.
The technique "Dockside" employed was to replace every other plank leaving every other original in place so as to have the proper shape to fair in the new planks and retain transom shape. Then, when every other new plank was in place and faired in, the remaining originals were removed and these new planks faired to the first set of replacements. The question became whether or not to butt and/or scarf in a bunch of shorties or replace the full length of the planks even though the rot may have only affected a small percentage of each plank. "Dockside" chose to replace the entire plank in most cases. This retained structural integrity and will please marine surveyors who might be scrutinizing the boat in the future.
Structural integrity was also enhanced with sawn sisters for many of the frames, new galvanized bolts for the shear clamp (the originals having rusted half away), and a knee to give the horn timber and transom some help with the stress of the afterstay in Bay Area winds. To avoid the problem in the future a diesel of the same weight as the original Greymarine 4 will be installed (Kubota) and a full cover fitted to help fend off the Bay Area's annual 30+ inches of rainfall.
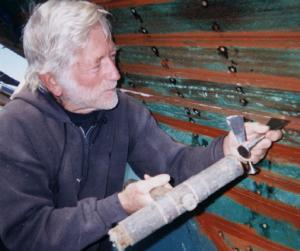
Photos selected to illustrate a sister, alternating planks replacement technique, new knee to support afterstay.
This project has been quite a learning for me. This is an understatement.
Seems that the more one does the more there is to do. Once the entire structure of the transom was replicated we got started with butting and scarfing on end pieces to the planks. We decided that this would not be an appropriate fix for the long run due to compromising structural integrity of the stern and difficulty in bending/forming 3 and 4 foot pieces of planking. So, we tossed out all that work and committed to replacing the stern planks in full.
This new time commitment meant that a further drying period was to be experienced by the hull. As a consequence the seams above and below the water line split open as the planks and ribs shrank and separated from one another. Accordingly, we decided that this was an opportunity to "re-fasten" the hull. I put quotes around the word "re-fasten" because to do a genuine re-fasten is to remove all the old screws and replace with fresh, slightly larger ones. We found that a high percentage of the screws we tried to remove were either substantially deteriorated or impossible to remove. This situation would have necessitated overboring each screw, securing dowels of wood, and then new screws. My checkbook and calendar could not handle this option.
The compromise was to drill new holes and insert new screws in each and every plank. This is what most people call a "re-fastening"; however, it does compromise the integrity of ribs and planks due to all the new holes and screws. I regret the decision, wishing I had a deeper pocket, but it was this, selling to someone with a fatter checkbook (thereby incurring a substantial loss, doing the full epoxy thing, or the chainsaw. Luckily, not one plank split, we didn't miss one rib, and there is no evidence that any ribs have split or cracked as a consequence of this procedure.
My apology to the very pure at heart. My motives are to save the boat for the future. Maybe I can afford the "overbore and dowel back to solid wood" at some future haulout..
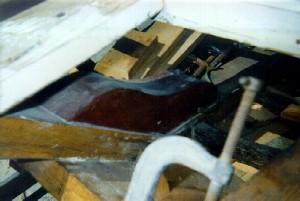
As we began our efforts to prepare the hull for caulking and during the insertion of new screws (boy, did this tighten things up... every plank pulled in at least an eightth of an inch!) we noticed that some ribs along the starbord side just below the waterline were not fairing in. Removing the ceilings in the starbord berth revealed that six of the eight thusly exposed ribs were cracked. This exposure of the hull interior revealed obvious leakage of water too. This situation is in addition to cracked ribs and rotten floor fastenings beneath the cabin sole which will be the focus of the haulout next summer. To do things justice at this time, however, sisters were in order. So was an examination of the port side. This revealed two cracked ribs. There are now eight sisters beneath each berth with the planks faired in nicely, thank you.
Some ruminations: Lest anyone reading this be put off from acquiring or continuing to recondition a Kettenburg, please note that I did not have this boat surveyed before I bought it. I knew that this (continuous discovery of more and more needs) could have been one of the consequences of going along with my emotional commitment to the boat when I first laid eyes on her. From marina chatter and other evidence I have also some to conclude that the boat had sat in the water for quite some time (over a decade?) without any care whatsoever! This lack of attention appears to me to be what brought on the serious deterioration of the fastenings between the floors and ribs (being galvanized as they are) and the other attenuating circumstances such as serious rot in the cabin overhead and after bulkheads.
I am sanguine with the investment of time and money to date, even though I will never financially recover the costs. One rarely buys and restores a wooden boat for financial reasons. I am looking forward to the pleasure and pride to be realized for having brought her back from a very sad place.
A note about the "corking": When we reefed out the seams we found that
the Kettenburg factory had used a series of strings of cotton to serve
as the corking material. We figured that we would not have this luxury
due to the unevenness of the seams after 45 years in the water. We were
surprised to find that the seams were terrifically even and true but
varied just enough that using cotton yarn felt more comfortable than
using the string again. The yarn was also something that our
boatwrights were more familiar with even though both had used string
during their combined years of experience on wooden boats numbering over
70. Jamestown Distributors carries both materials.
Updates:
November 1999
September 1999
August 1999
August 1999
Update: September 1999
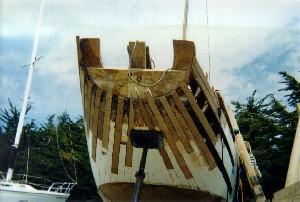
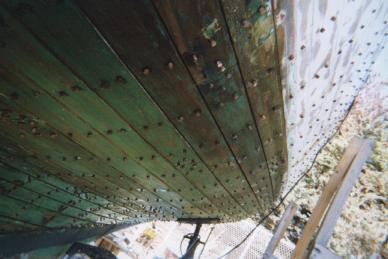
This shows the length of the full planks comprising the stern. Compare to the earlier photo above where we were just going to replace the rotted portions.
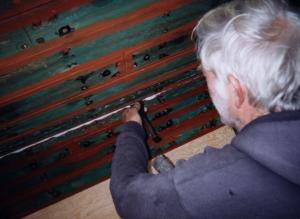
A bunch of photos similar to this one showing all the new screws, beeswax libricated, awaiting being driven home could be entitled "plastic boat owners nightmare"!!
Once the screws were in place some 5000 plugs were cut and glued in over each countersunk screw.
This photo, taken just at the forward end of the starboard berth facing stern, shows the eight sisters we fitted to take care of six cracked ribs. The berth ledger was factory fastened by nails and rested upon the curve in each rib. Guess where the cracks were.

Update: November 1999
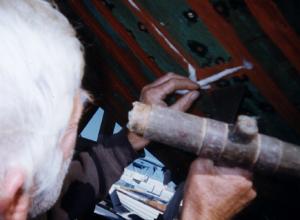
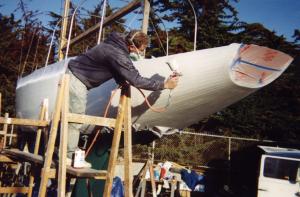
Boatwright, Doug Doughty, of "Dockside Maintenance and Salvage"
gets ready to adjust the last of the new planks. The sign on the
scaffols reads "Questions: free/ Answers: $2.50 aminute" Because we
have been doing our work in a public marina boatyard there has been a
never ending stream of people curious to ask the basic questions. We
estimate that about an hour a day or more is consumed this way. So, the
sign gave us back some needed work time. We used to give away a flyer to
answer the basics, but that didn't seem to slow down the time erosion as
people still asked the questions.

Doug and David, another friend and experienced boatwright, at work
on K-38 # 27. 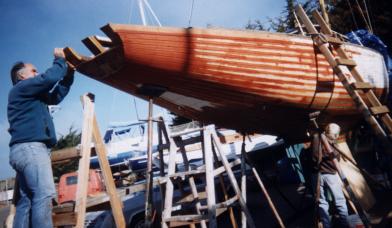
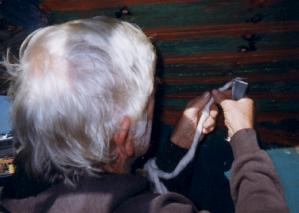
David gathers up the raw cotton yarn, draping it over his forearm
in preparation of the initial placement into a seam. 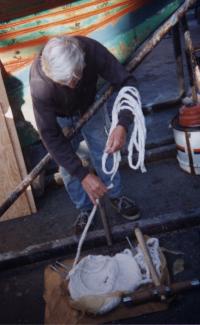
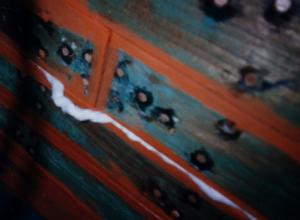
David runs the yarn the full length of the seam, tucking it into
the seam every few inches. The yarn is twisted to fully fit the
variations in the width of the seam. 
Another view of David running out the full length of the yarn 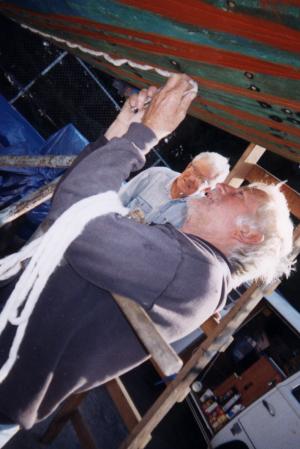
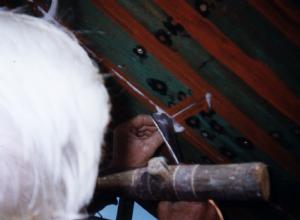
After the yarn is fully run along the seam David revisits the yarn
to lightly tuck all of the yarn into the seam. 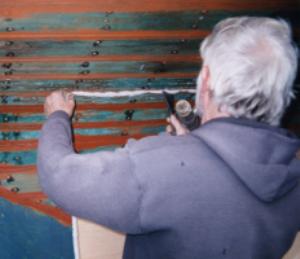
Another visit along the full length of the seam begins the first
actual driving of the yarn into the seam with the iron and mallett.
A second visit along the length of the yarn sets it further into
the seam.

A final tapping on the iron fully sets the yarn.
Not enough yarn for the full seam means splicing. To keep the
thickness even half a braid is removed from the end of both the loose
yarn in place and the new yarn to be added.

The twisting and tucking begins again with the spliced-in yarn.
At the location of plank butts the initial tuck is left open so
that the yarn for the butt can be installed before the seam is set.
The yarn for the butt is placed and driven home just
like along the rest of the seam. The seam yarn is then placed over it
and driven home.
Update: January 2000
Our painter, Don, applying the first of two "split coats" (half primer/half gloss enamel) after about 3000 hours of time invested in the project overall. We applied three coats of primer, glazing what few hollows remained in between coats, two "split coats", and one coat of finish, gloss enamel. The weather intervened before we could apply the second finish coat. We will return to this fairing/painting next fall.
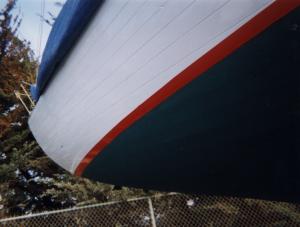
The boot top. We bought the last two gallons of Petit Trinidad self ablating paint for the bottom. It is no longer available in CA. due to Petit not being willing to jump through the regulatory hoops here to get it certified. I suppose we will have to locate it in other states or choose to switch to another type when next we address the bottom (August/Sept.).

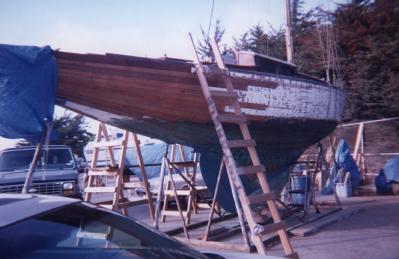
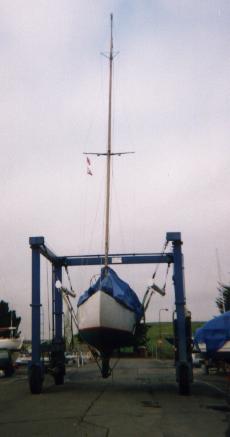
The job is finished for now. The straps are under the hull. The short haul to the ways is about to begin.
The rain and no cabin to deck caulking necessitated that the blue tarps remain in place. Darn it. Regardless of the "unsightly" tarps there is no escape from the pride one feels in having persevered this far into the renovation.
S P L A S H !

She lay in the boatyard berth for two days to watch for "weeps and seeps". A total of about less than a quart of water in 24 hours found its way into the bilge. That stopped within the next 24 hours. Current rate of "weeping" is almost nil.
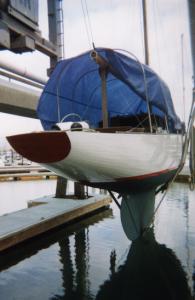
At home in her own berth after 385 days out of water and a completely new stern/transom. This berth overlooks the Golden Gate bridge. At some point after we pull the stick and re-finish it, I hope to run a camera up the mast so that everyone can log onto a live camera view of the bay at any time.